Introduction
A little weekend project. Generating award diplomas using Power Apps, Power Automate, OneDrive, and Word Template. In this post, we look at how the project is built in a step-by-step format. Hopefully, you find other use cases where this can be applied. For instance, populating Word templates such as contracts, newsletters, Christmas cards, and any type of document that have similar content and doesn’t change too much.
Table of Content
- Creating the Diploma Word Template
- Creating the Power Automate Flow for Generating Diplomas
- Creating the Power App
- GIF Walkthrough of the App
- Conclusion
Prerequisites
- A trial or environment for customizing apps and flows
- A license for Office Apps and sending emails with Outlook
- Familiar with Word Templates
- Familiar with Power Automate
- Familiar with Power Apps
Creating the Diploma Word Template
This step-by-step walk you through the process of creating a Word Template that we are going to populate with values from Power Apps.
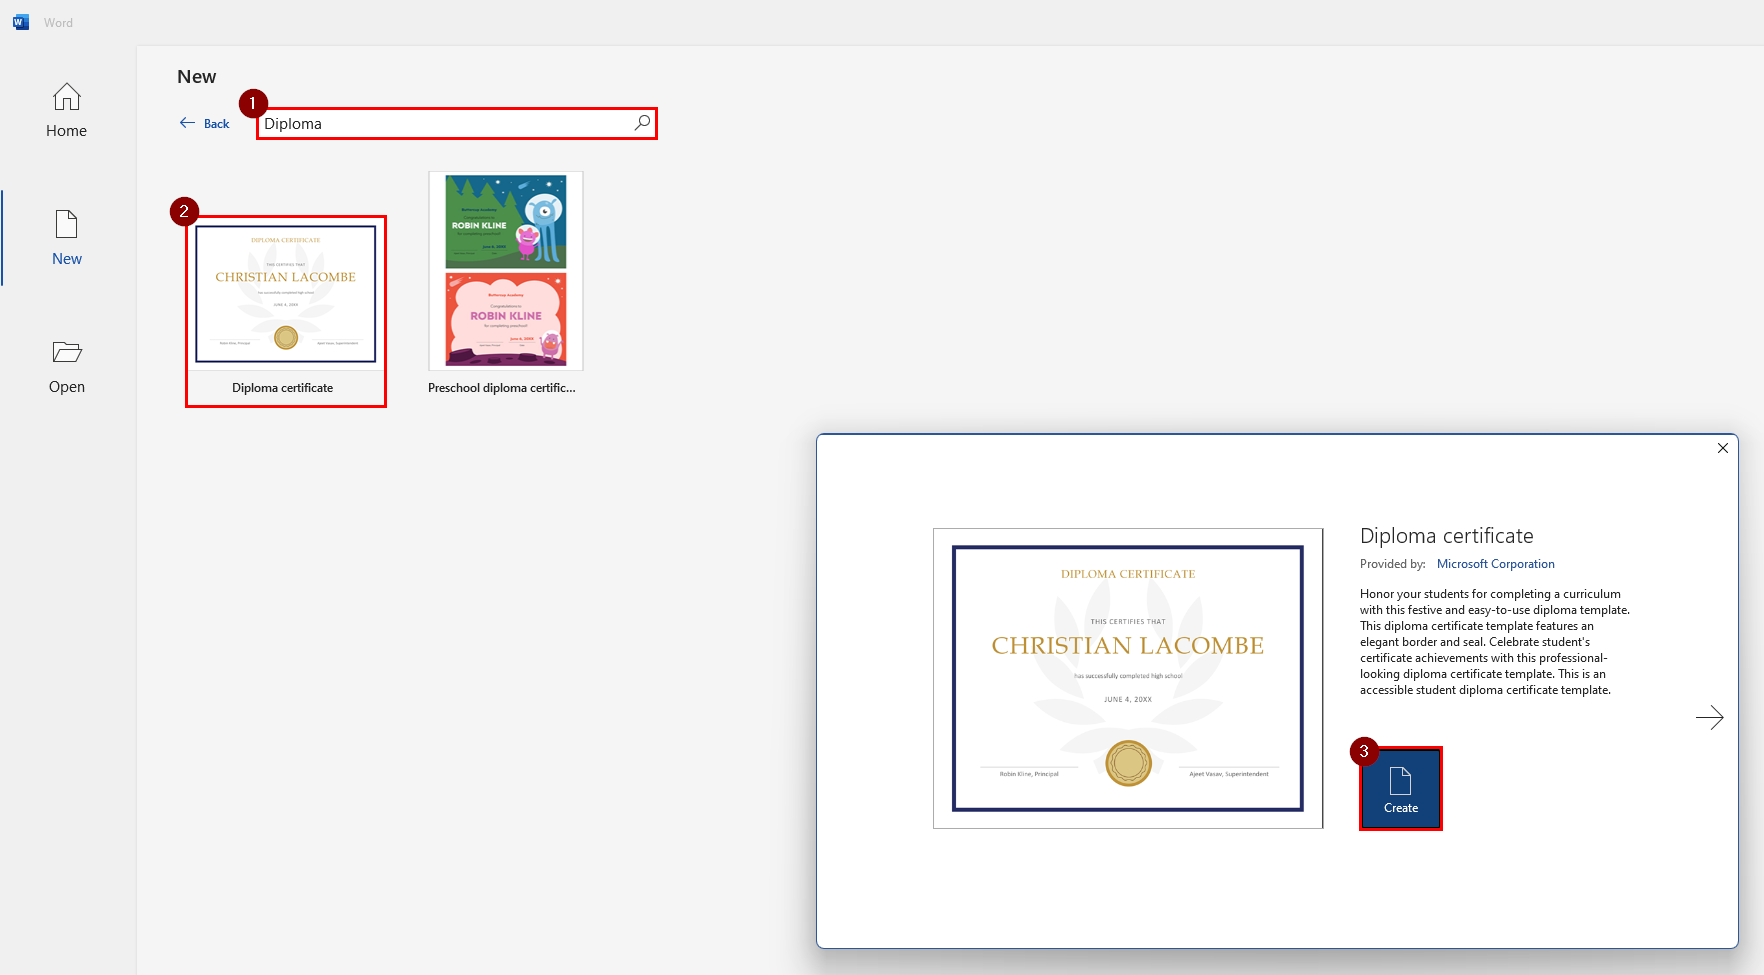
Step 1: Open Word > Click on More Templates.

Step 2: After clicking on More templates > Search for Diploma > The search result changes to another view.

When the search result opens > Select the Diploma certificate and a dialog opens > Click Create to create a new Word file from the template.
Step 3: To be able to create a Word Template that we can populate with Power Automate we need to enable det Developer setting in Word.
Go to File > Options > Customize Ribbon > Check the Developer checkbox under Main Tabs in the dialog as seen in the image below.

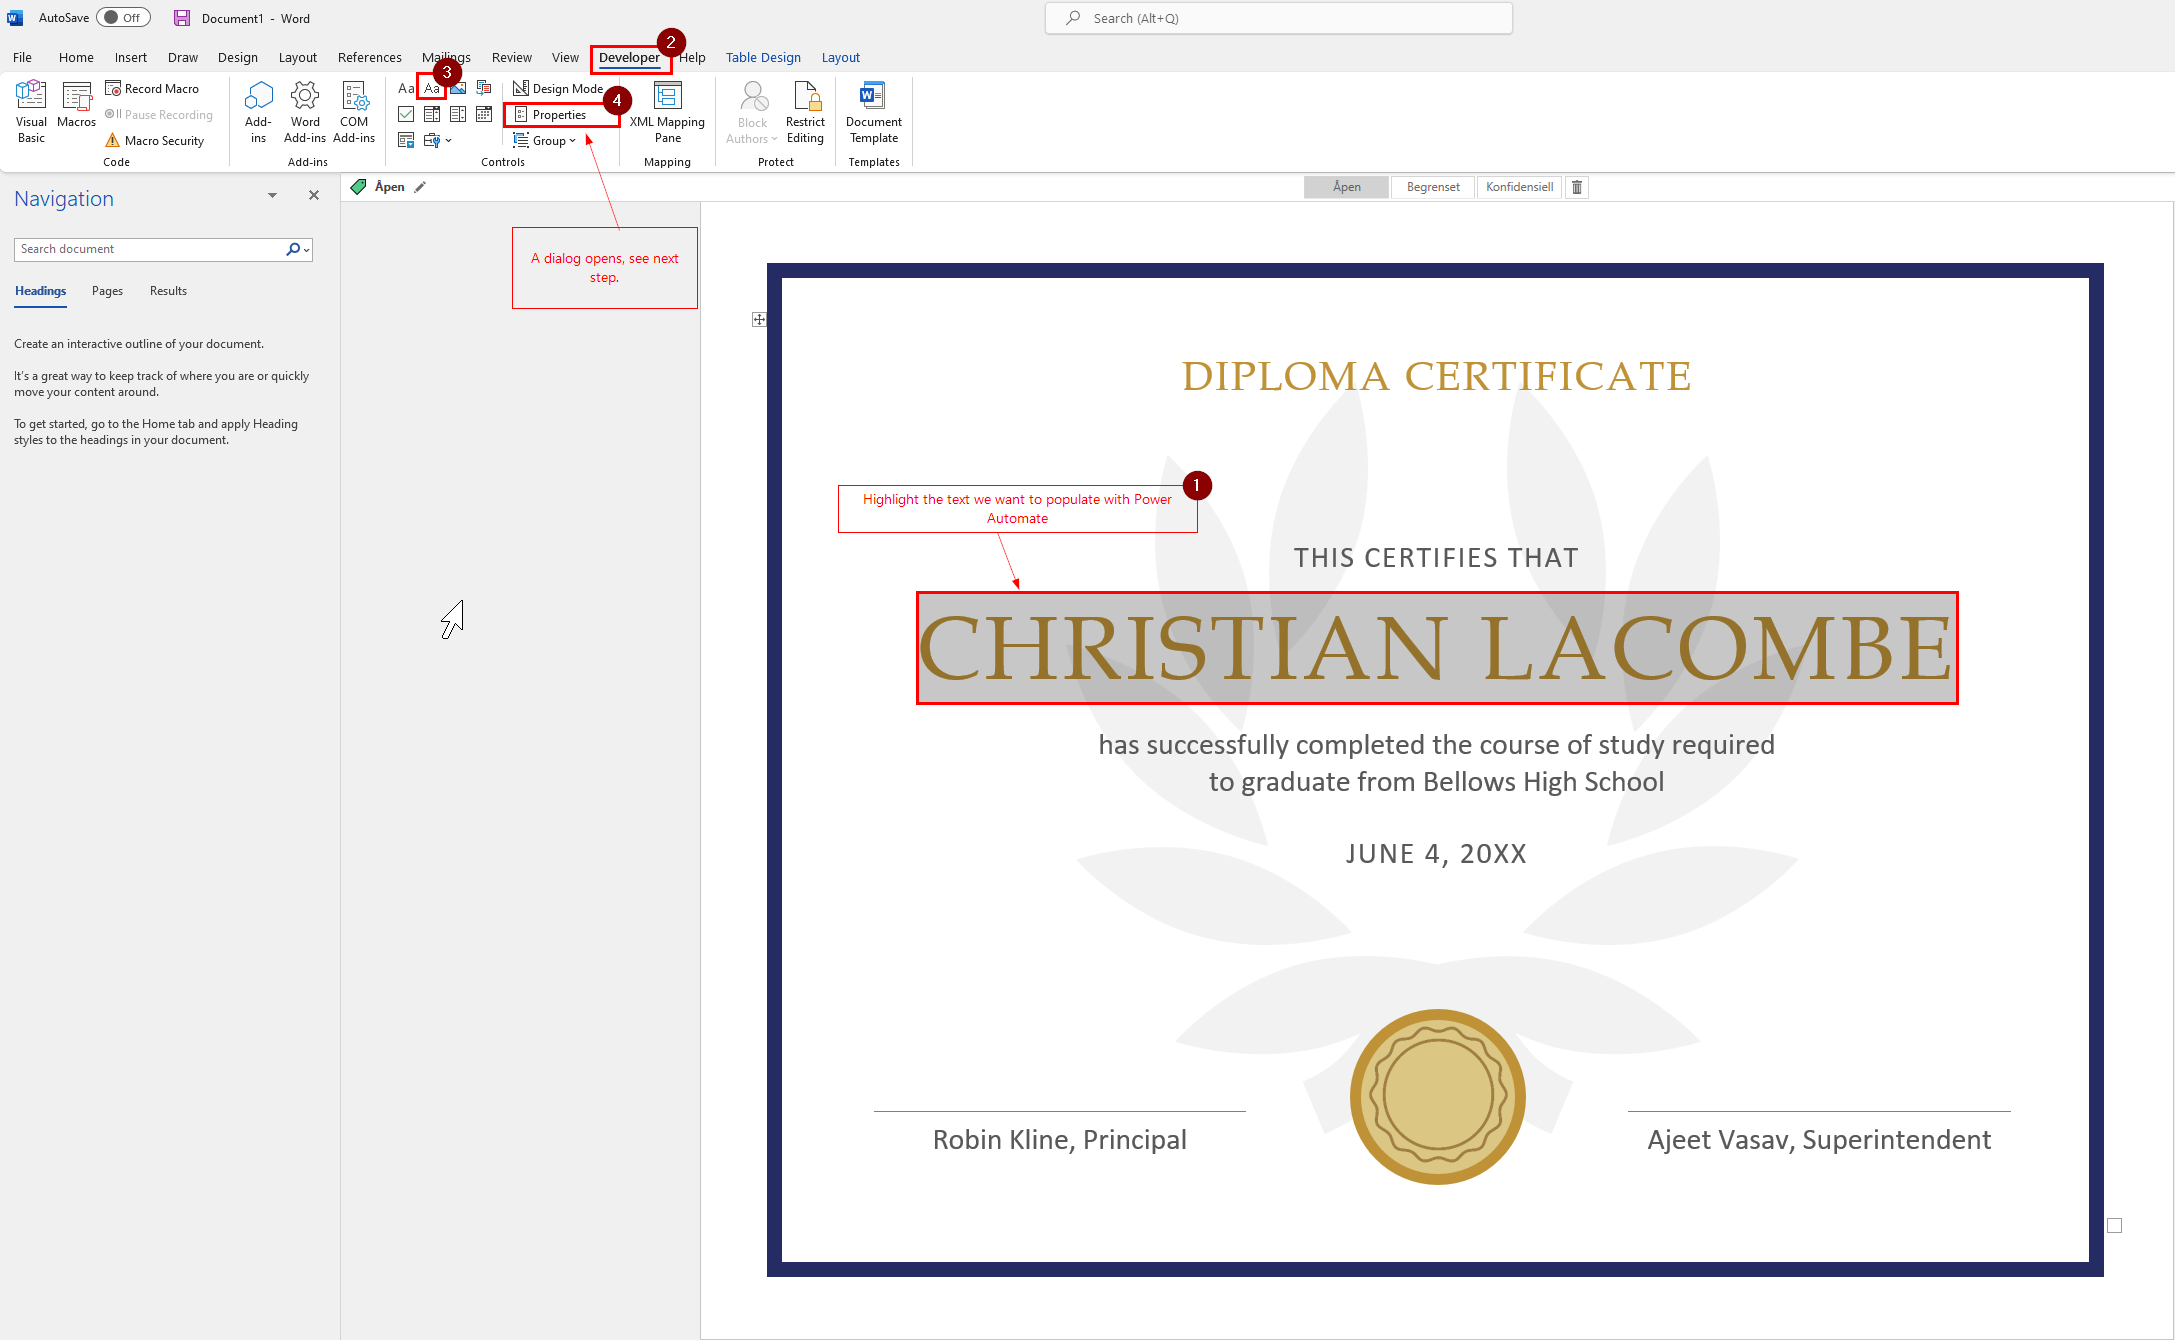
Step 4: Next we are looking at how to create dynamic values that we are going to populate with Power Automate.
After adding the Developer tab and we are back at the Tempate we do the following to create a dynamics template we are going to use in Power Automate. First highlight the text we want to populate > Click on the Developer tab > Click on Aa to add text as the value to populate > Click on Properties to give the field that we are going to populate a name. This opens a dialog as can be seen in the image after the one below.
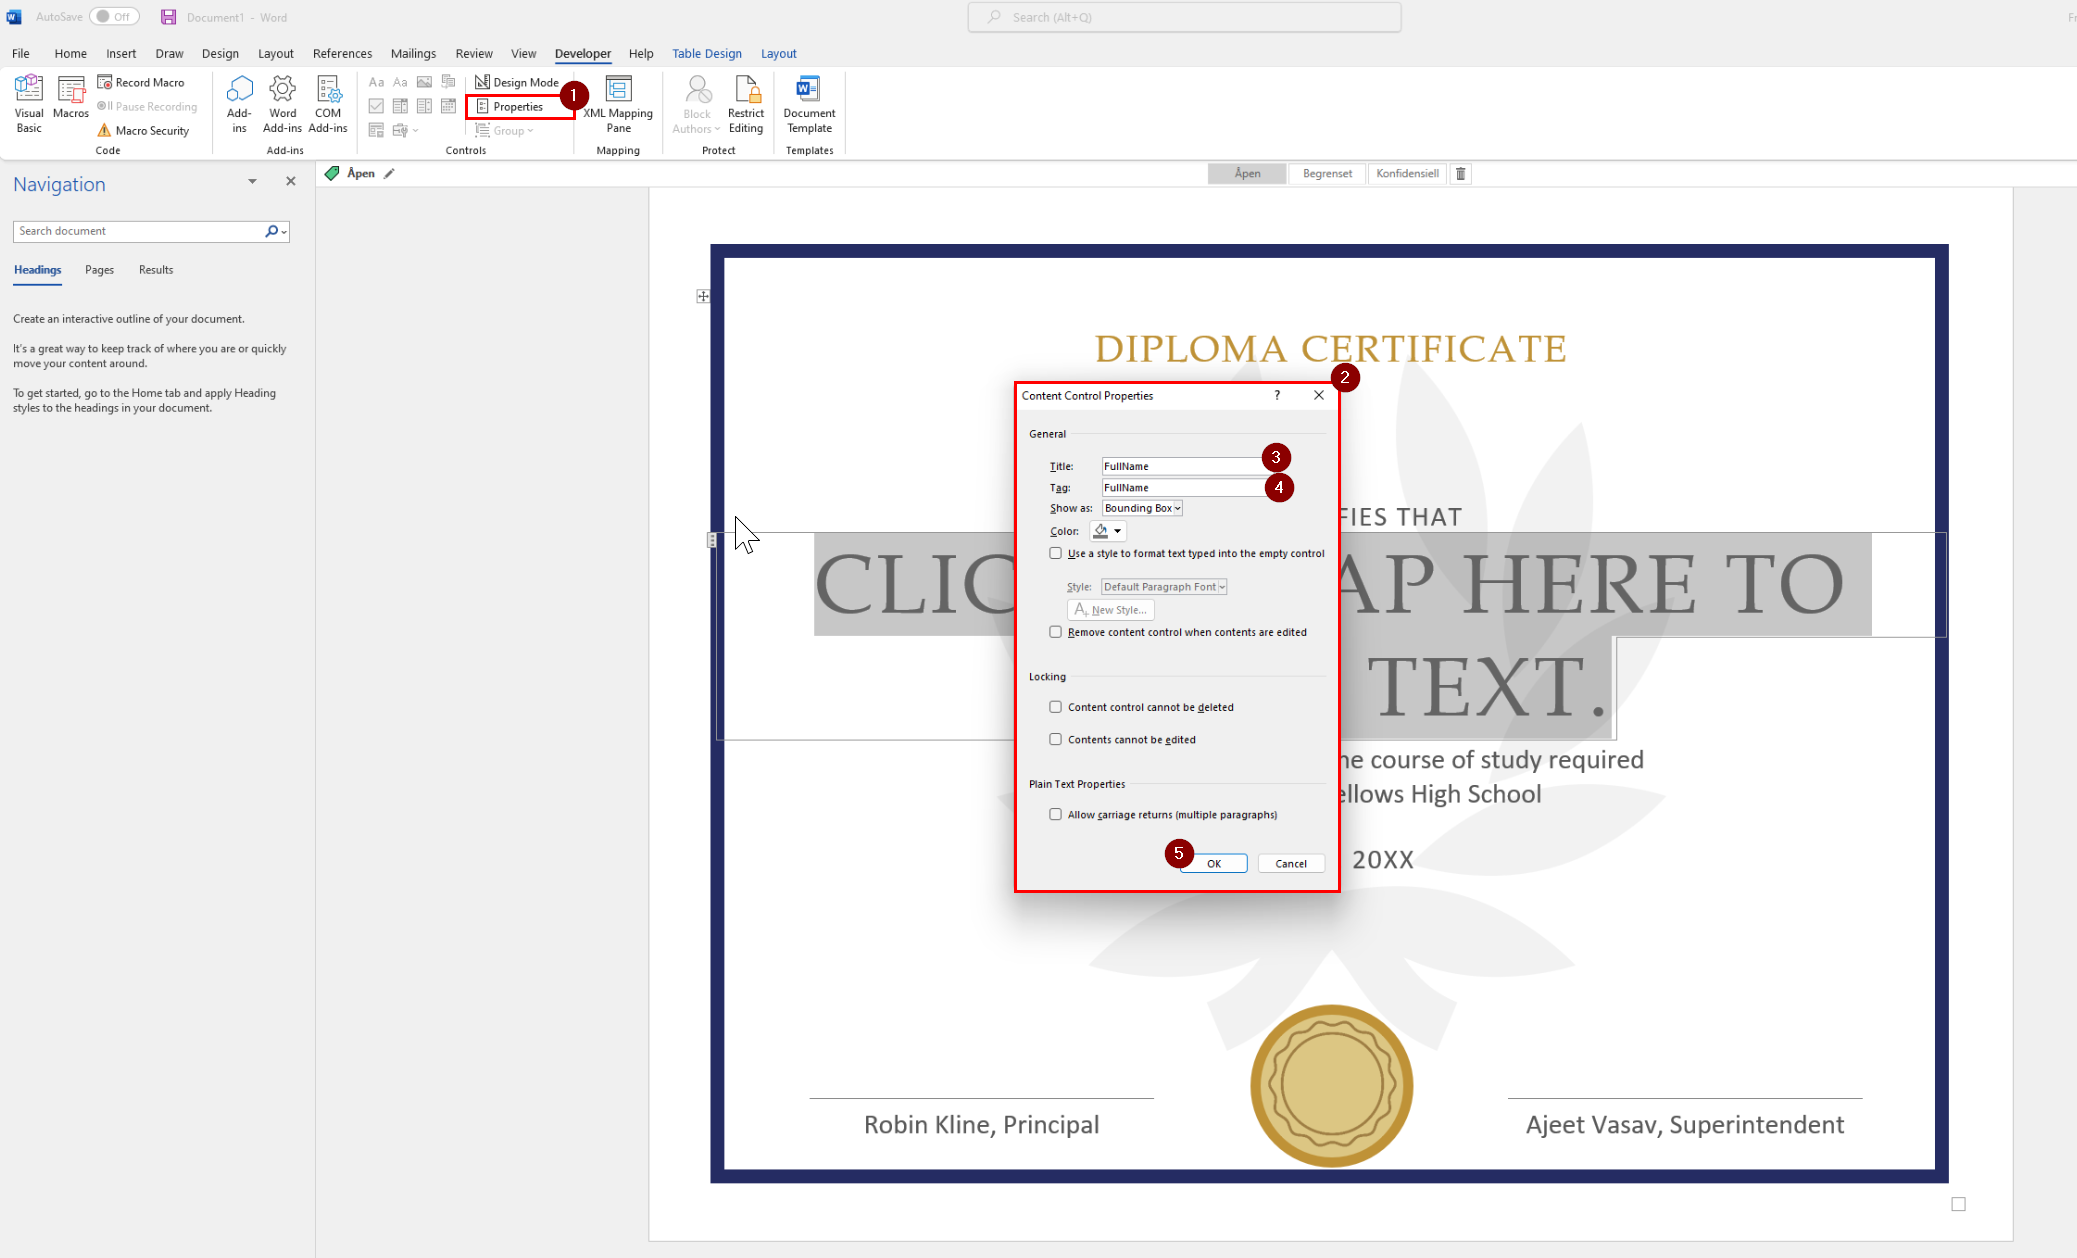
Give the control a Title and a Tag as seen in the image below and click OK.
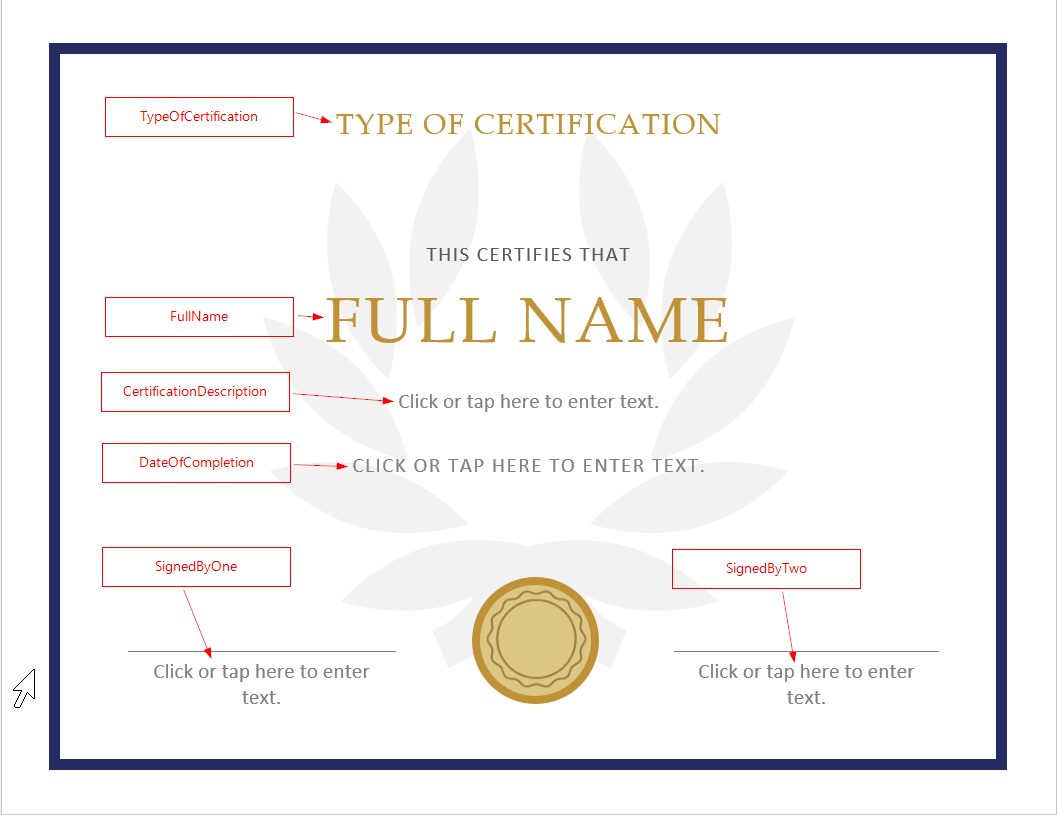
Step 5: Proceed the same steps for all parts of the Word template we want to add dynamic values to. In this example, I added the following properties in the template as seen in the list and image below.
- FullName
- CertificationDescription
- TypeOfCertification
- DateOfCompletion
- SignedByOne
- SignedByTwo
Step 5: After adding the properties to the template Save the template and save it to your OneDrive. In this example, I’ve created a root folder named Award Generator and added the template in the root folder, and another folder for Generated Awards where all the awards is stored.
See image below for reference.

Step 6: This concludes the steps for creating a Word template with properties available to populate with Power Automate.
Creating the Power Automate Flow for Generating Diplomas
The next step, is to create a Power Automate flow that uses the Word template and populates the properties with dynamic values from the Power App.
Below is the overview of the flow, we look more into the details in the steps in this section.

Step 1:
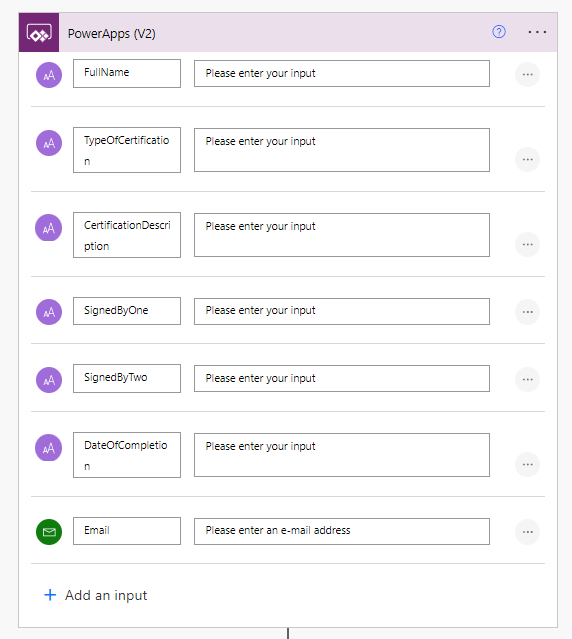
First, we need to add the Power Apps V2 trigger. It allows as to specify the parameter in the trigger itself and here we add all the properties we added to the template, and an email property that we are using to send the award to the person we want to.
Step 2: The first actions in the flow is:
A compose action for creating a predefined naming standard for the awards, which might looks like this “2022.11.11_Chef_of_the_Year_John_Doe”. The formula used looks like the following:
// DateOfCompletion_TypeOfCertification_FullName
formatDateTime(triggerBody()['text_5'],'yyyy.MM.dd')_replace(triggerBody()['text_1'],' ','_')_replace(triggerBody()['text'],' ','_')
Further, we use the action Populate a Microsoft Word template to generate the award document with the values sent from the Power App.
Next, we create the file in the OneDrive folder we looked at earlier using the OneDrive Connector..

Step 3: The remaining steps in the flow.
Continuing, we convert the Word template to a pdf file using the action Convert Word Document to PDF.
Next, we create the PDF to the OneDrive folder and afterwards we get the content by using the action Get File Content.
Onwards, we clean up the folder by deleting the Word template that has been converted into a PDF. For deleting the fil we used the action Delete File.
The last step, is uses the action Send an email (V2) with the award PDF as an attachment.

Step 4: This concludes the part about how the Power Automate is built. Next up, is the Power App.
Creating the Power App
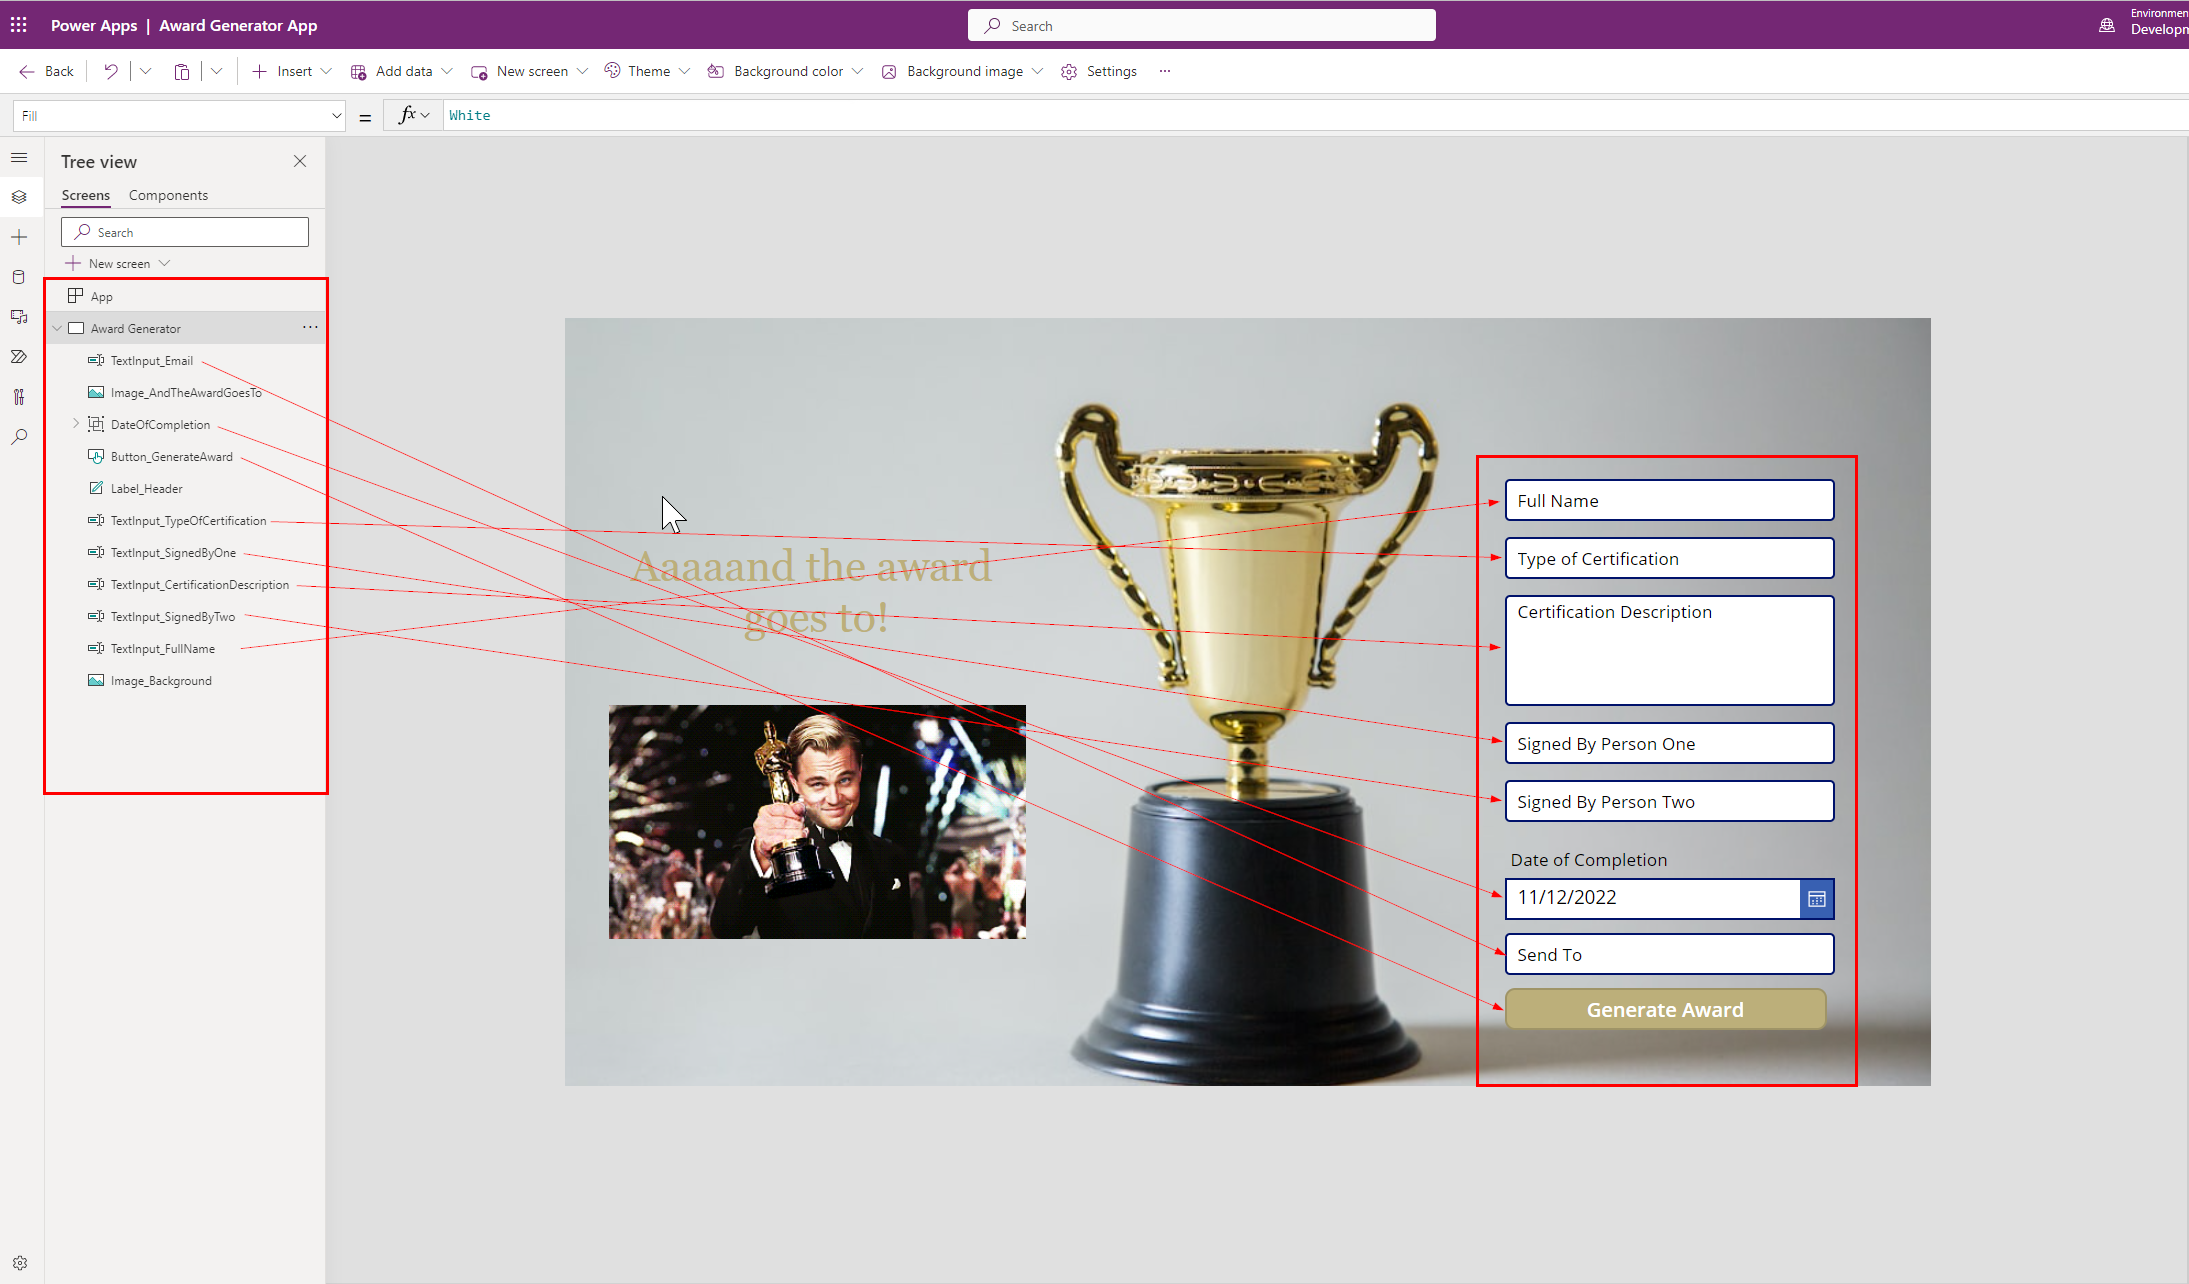
In this section we look at how the Power App is built. Below is an image of how the app looks.

Step 1: First we need to create the fields that we added to the Power Automate flow.
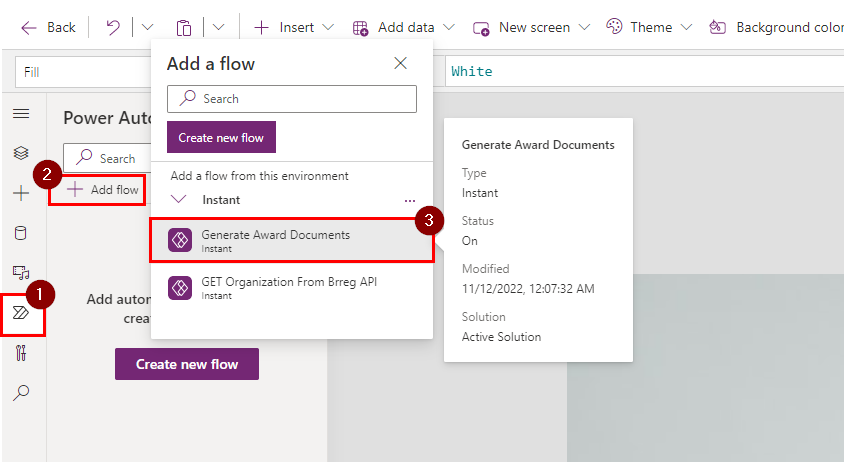
Step 2: We need to add the Power Automate flow to the Power App.
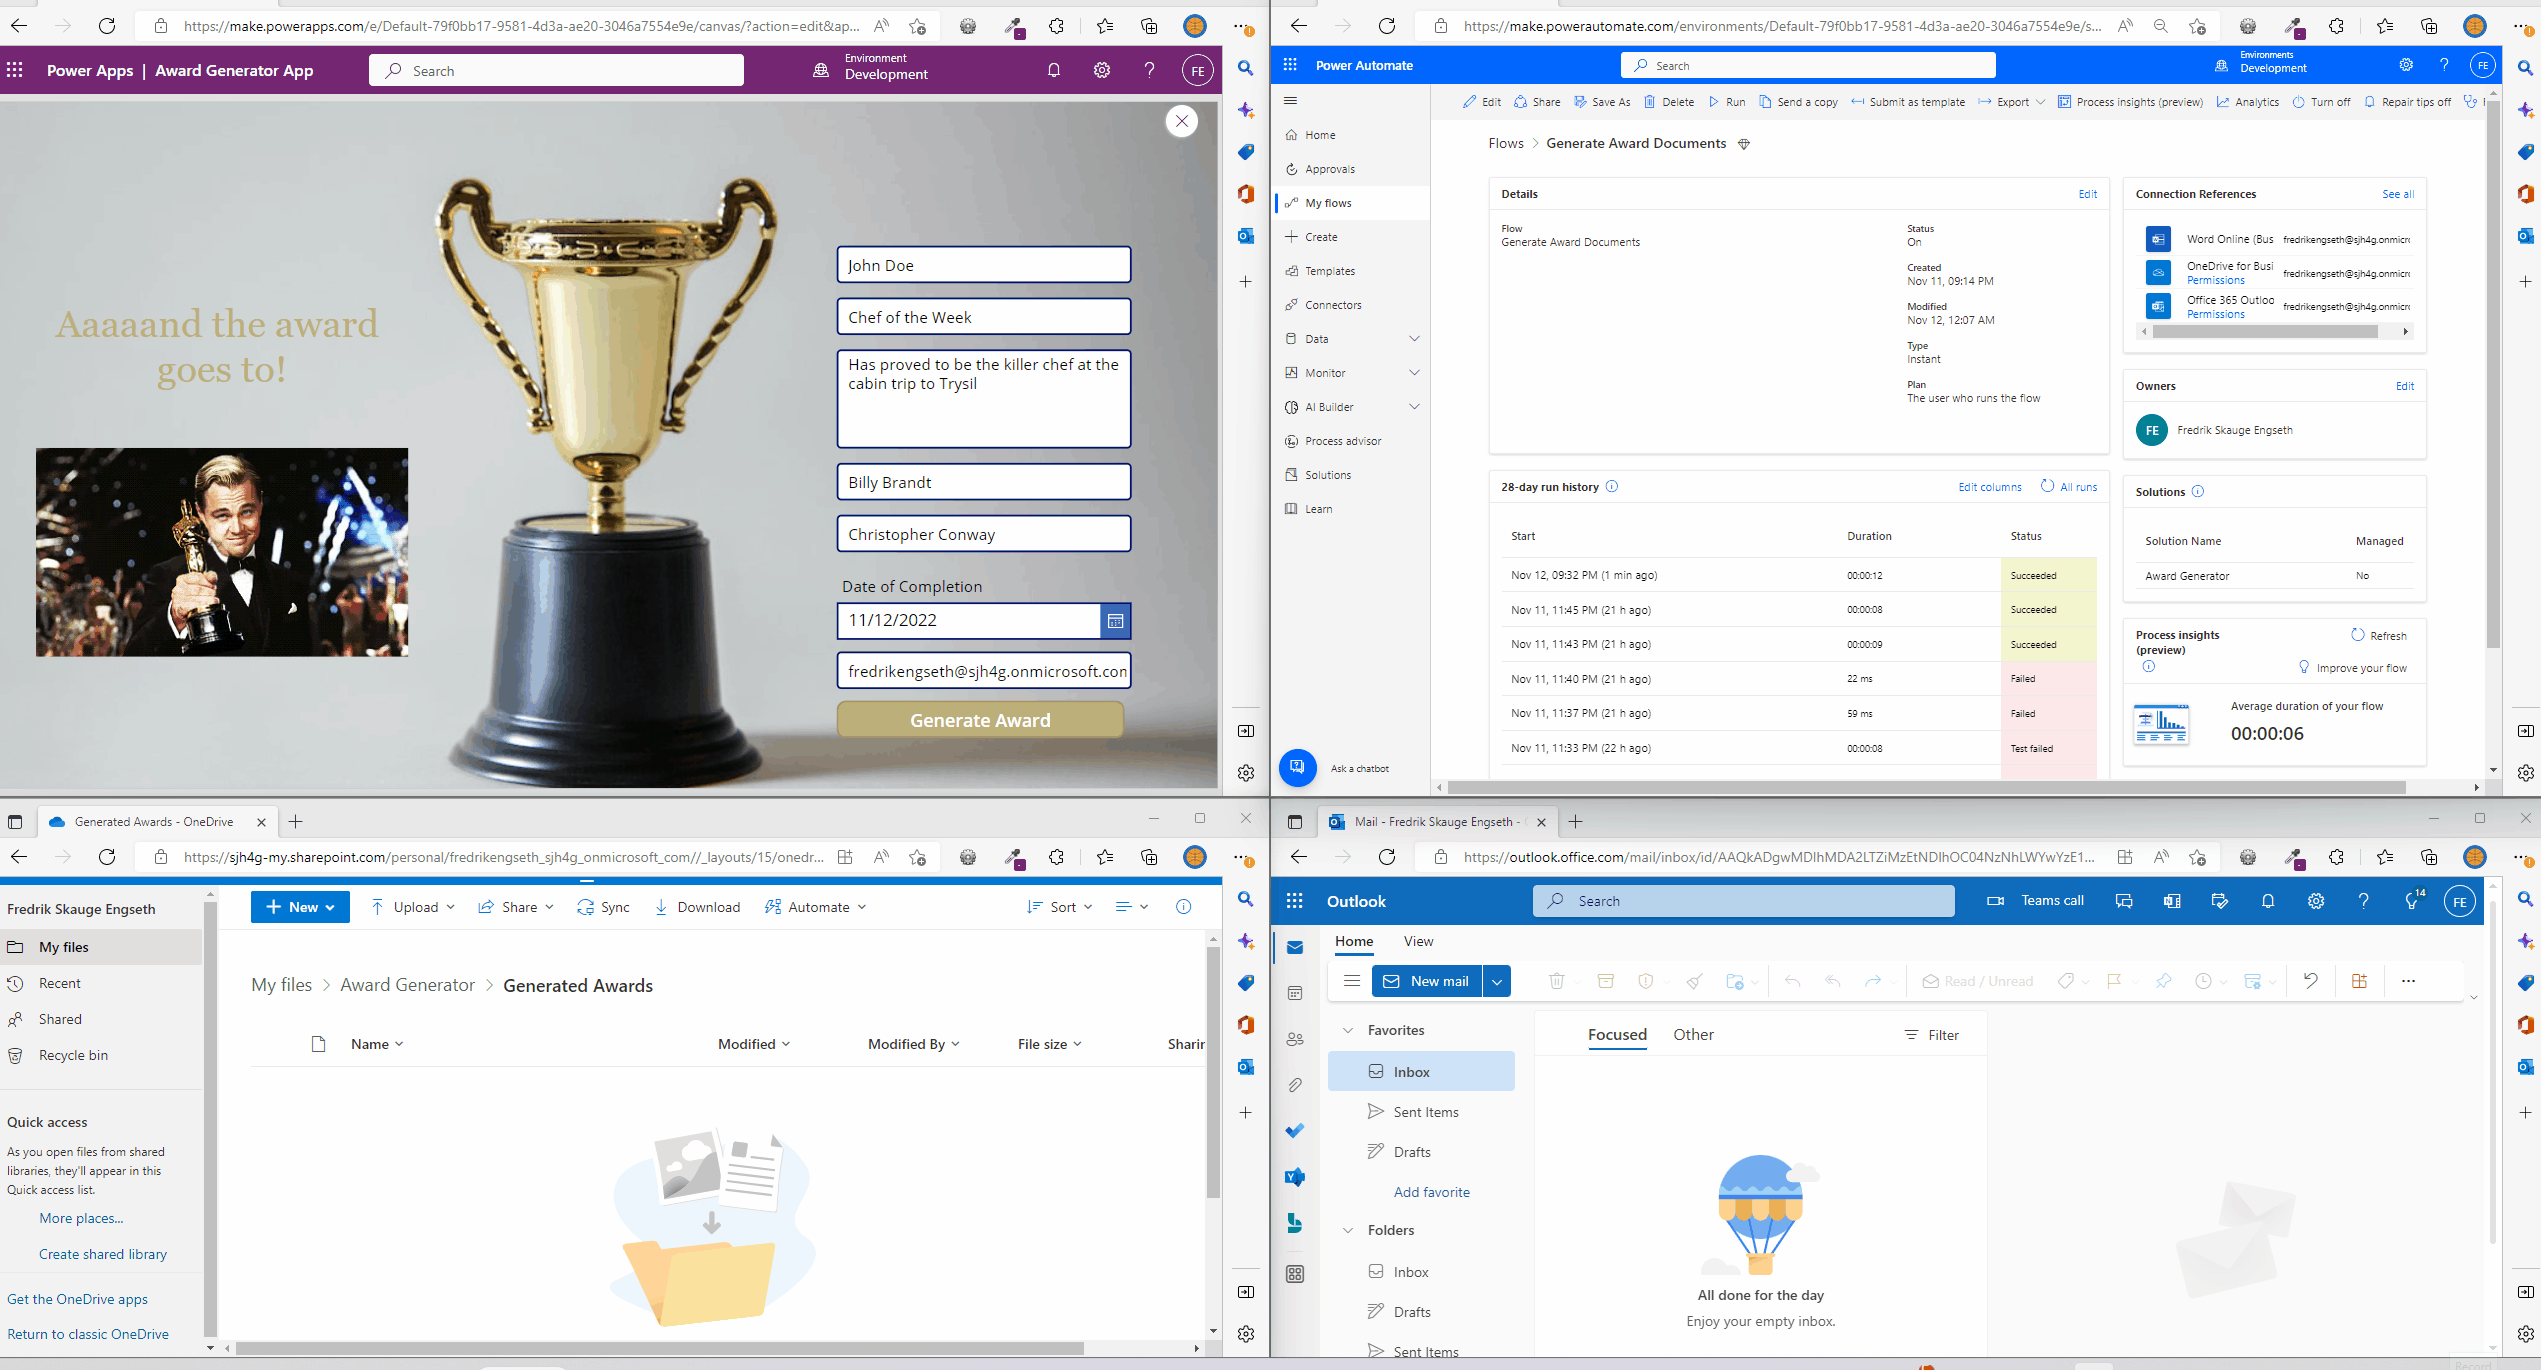
Step 3: Next, we add a call on the button Generate Award that calls the Power Automate flow with the values of all of the fields. This triggers the flow and handles all the steps from generating diplomas and sending them the email address specified in the Send To input field.

Step 3: These are the main parts of the app and concludes the section. Next up, is a gif of how the app looks like when running.
GIF Walkthrough of the App
This section contains a gif showing how it looks like when you run it.
Conclusion
Too sum up, this was a little fun project to test out how to populate Word Templates using Power Automate.
For More Content See the Latest Posts
- Speeding Up Power Automate: Replacing ‘Append to Variable’ with ‘Compose’ for Efficient Workflows
 Discover how replacing ‘append to’ variables with ‘compose’ actions in Power Automate can drastically speed up your flows.
 - Why and How to Implement DevOps?
 Discover how to implement DevOps for faster software delivery, improved quality, and better team collaboration.
 - Quick Tip: Show and Hide Option Set Options in Dynamics 365 with JavaScript
 Learn to dynamically manage Option Set options visibility in Dynamics 365 forms, enhancing UI and user experience in just a quick read.
 - Understanding Dynamics 365 Customer Service Components: Key Features and Benefits
 Learn the concepts of Dynamics 365 Customer Service: Boost satisfaction with case management, knowledge bases, and multi-channel support.