Good winter morning, thought I make a post on how you can set up a Ghost CMS instance on an Ubuntu server hosted on Azure. Even though it wasn’t the platform I ended up with, there might be someone you might find it useful.
Step 1 – Setting up Ubuntu Server 18.04 LTS on Azure
If you want to follow along, this requires access to an Azure portal and have a license, either an MSDN subscription or another one. If not, don’t worry. You can create a free version which gives you a free credit of 200$ (in 1650nok, in the time of writing) on every service Azure has to offer for 30 days, and 12 months of free popular services, as well as 25 services that is always free.
To start with we need to create a resource group for our resources. To create a resource group in Azure, click on Resource Group and hit Add.
Chose a Subscription, give it a descriptive name in the field Resource group. Then choose Region (I prefer West Europe, but choose what suits you). If you like to add Tags to the Resource Group **click Next, or click Review + Create to add the new Resource Group.**
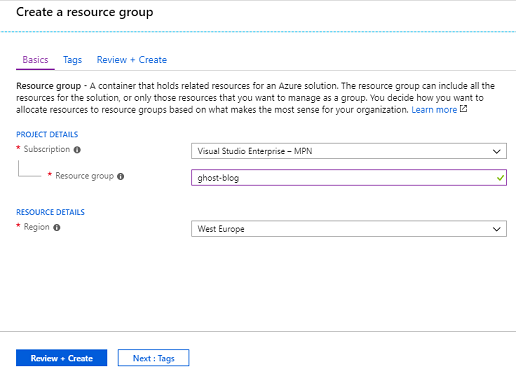
When the Resource Group is created go to the newly created group. Now we need to add a resource. To create a resource click Create resources or the + Add button in the Overview pane.

When the Marketplace open search for Ubuntu or scroll until you find it and select the Ubuntu Server version of your desire (I chose the latest 18.04 LTS).

Read through the description of Ubuntu Server, select a Deployment Model and hit Create, more setup settings opens in the next step.
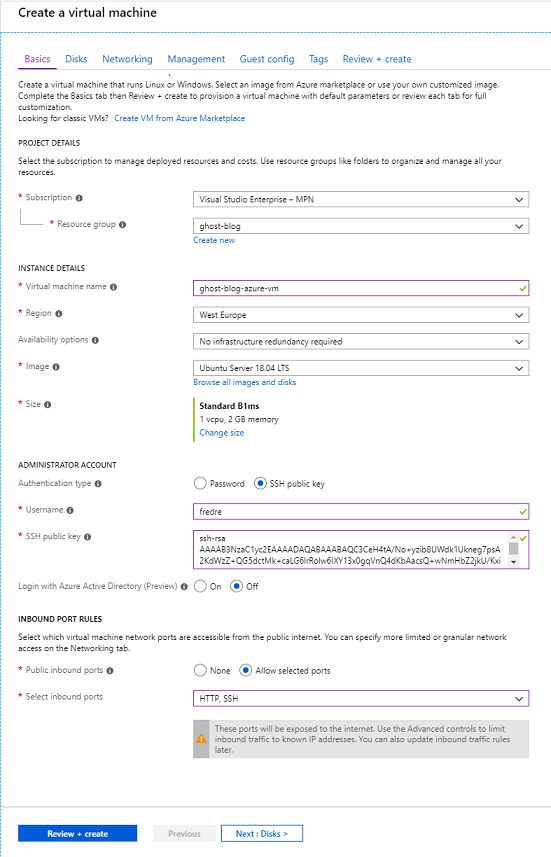
Now we need to setup the Basic settings on the virtual machine.
Specify the Resource Group created earlier, give the virtual machine a descriptive name (Virtual Machine Name), Region of your choice. I use Ubuntu Server 18.04 LTS and the size Standard B1ms with 2 GB of memory, Ghost requires at least 1GB so the smallest will do also.

Further on, setting up Administrator Account and SSH. If you are a Windows user, I used Bash for Windows to generate the SSH Public Key with the following command:
ssh-keygen -t rsa -b 2048
You can also view the Microsoft docs on setting up SSH, I needed to use those to figure out a problem with my setup.
When everything in the basic settings is setup you can Click Review + Create and hit Create to finish up, if you like to customize even further feel free to go through all the other steps also. I just went for the basics on this site. When you clicked Create it may take some time to get everything deployed. Took about 2 minutes for me..
When the deployment is complete you get a view like below

When everything is up and running go to the Resource Group you created to see all the resources that got deployed, then click on the virtual machine resource (the first in the list below).
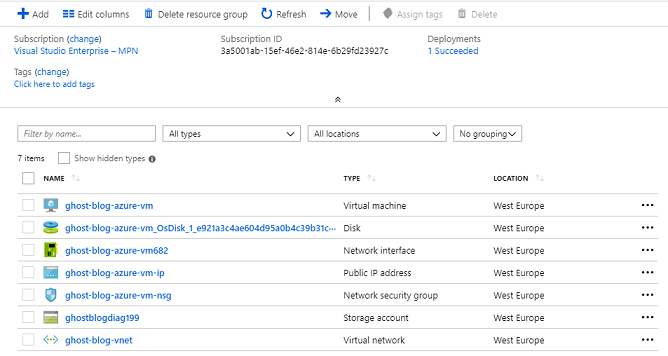
Then click Connect to get access to the virtual machine with SSH.
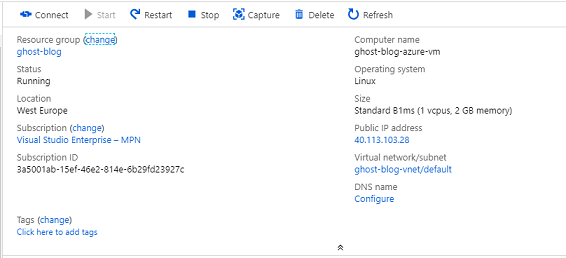
Keep the default settings to connect by IP address over Port 22. Use the copy button under Login using VM local account.
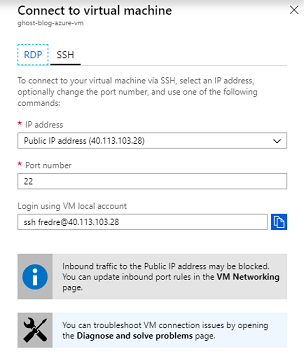
This may look like this
ssh azuser@10.111.12.123
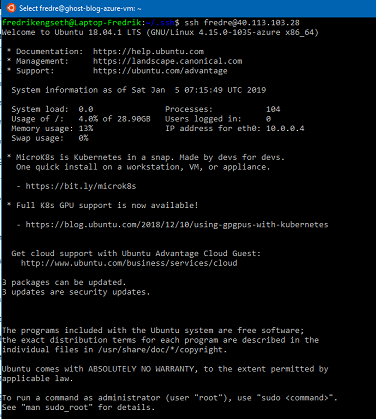
Then open the shell or SSH client used to generate the public key, and log on with the login information from the SSH pane in Azure.
During this step, I stumbled upon some problems..
If the SSH connection failed? A helpful command to troubleshoot client machines is.
ssh -vT username@ipadress
During the SSH key generating I made a mistake when the ssh-keygen prompted for “Enter file in which to save the key, I typed the name of the Virtual Machine, and this caused the connection to fail with the message SSH Permission denied (publickey), since it didn’t find the expected file, which is id_rsa.pub.
To avoid the problem, just hit enter on each step ****and use the defaults, and you will be spared from a headache. If you desire add a bit more security you can also add a password. Then you will be prompted for password when you logon with your credentials (ssh username@ipadress), if not you will get access by just typing the credentials.
This was the setup of the Ubunto 18.04 LTS Azure Virtual Machine, the next step will be adding Ghost to the VM.
Step 2 – Adding Ghost to the virtual machine
Now we’re going to setup Ghost, this part can also be found at the Ghost docs below
How to install & setup Ghost on Ubuntu 16.04 + 18.04
First thing we need to do is to logon your virtual machine with SSH.
ssh username@serveripadress
Create a new user
First we need to create a new user as the root user.
# Create a new user and follow the prompts
adduser fredreghost
Note: Don’t use the user name ghost, this will cause conflict with the Ghost-CLI. It’s important to use an alternative name
You will get prompted the following:
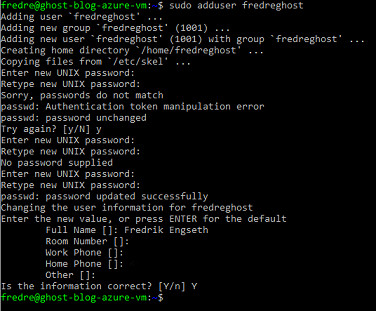
When the user is created, we need to add the user to the superuser group to unlock admin privileges
# I had to set the user with sudo in front
sudo usermod -aG sudo fredreghost
And then login as the user
su - fredreghost
# When logging in you get prompted for password
Results after creating new user and successfully logged in. Here you can see that I needed sudo in front to create the new user.

I recommend to keep all your passwords in a password store, like KeePass. This makes it a lot easier to remember passwords if it has been a while since you logged on the server for instance. Then you have control over the the different users and don’t need to spend a lot of time resetting forgotten passwords. We are going to create more users down the line, it can be a good idea to have the credentials stored on place. Next..
Update packages on the server
Then we need to ensure that all installed packages is up to date.
# Update package list
sudo apt-get update

# Update installed packages
sudo apt-get upgrade
Install NGINX
Ghost is using NGINX server and the SSL configurations requires NGINX 1.9.5 or higher.
# Install NGINX
sudo apt-get install nginx
If ufw was activated, the firewall allows HTTP and HTTPS connections. Open Firewall:
sudo ufw allow 'Nginx Full'
Install MySQL
Next, we need to install MySQL to be used as the production database.
# Install MySQL
sudo apt-get install mysql-server
MySQL on Ubuntu 18.04
Since I’m running Ubuntu 18.04, a password is required to ensure MySQL is compatible with Ghost-CLI. This requires a few more steps!
# To set a password, run
sudo mysql
# Now update your user with this password
# Replace 'password' with your password, but keep the quote marks!
ALTER USER 'root'@'localhost' IDENTIFIED WITH mysql_native_password BY 'password';

# Then exit MySQL
quit

# and login to your Ubuntu user again
su - <user>

## Install Node.js
Then we need to have a supported version of Node installed system-wide in the manner described below. If you have a different setup you my encounter problems.
# Add the NodeSource APT repository for Node 8
curl -sL https://deb.nodesource.com/setup_8.x | sudo -E bash

# Install Node.js
sudo apt-get install -y nodejs
Install Ghost-CLI
Now let’s install the Ghost-CLI, the command line tool to help you get Ghost installed and configured for use quickly and easily. The NPM module can be installed with npm or yarn.
I use npm.
sudo npm install ghost-cli@latest -g
When installed you can use ghost help to see a list of available commands.
Install Ghost
Once your server is correctly setup and the ghost-cli is installed, you can install Ghost. The following steps are the recommended setup. If you would prefer more fine-grained control, the CLI has flags and options that allow you to break down the steps and customise exactly what they do.
Note: Installing Ghost in the
/rootorhome/<user>directories results in a broken setup. Always use a custom directory with properly configured permissions.
Create a directory
Create a directory for your installation, then set the owner and permission
# I'll name my 'ghost-blog' in this example; you can use whatever you want
sudo mkdir -p /var/www/ghost-blog

# Replace <user> with the name of your user who will own this directory
sudo chown fredreghost:fredreghost /var/www/ghost-blog

# Set the correct permissions
sudo chmod 775 /var/www/ghost-blog

# Then navigate into it
cd /var/www/ghost-blog
Run the install process
Almost there, now that you created the directory and you came this far. It’s finally time to install Ghost with a single command.
ghost-install
During the installation, the CLI will ask a number of questions to configure your site:
Blog URL
Enter the exact URL your publication will be available at and include the protocol for HTTP or HTTPS. For example, https://example.com. If you use HTTPS, Ghost-CLI will offer to set up SSL for you. Using IP addresses will cause errors.
MySQL hostname
This determines where your MySQL database can be accessed from. When MySQL is installed on the same server, use localhost (press Enter to use the default value). If MySQL is installed on another server, enter the name manually.
MySQL username/password
If you already have an existing MySQL database enter the the username. Otherwise, enter root. Then supply the password for your user.
Ghost database name
Enter the name of your database. It will be automatically set up for you, unless you’re using a non-root MySQL user/pass. In that case the database must already exist and have the correct permissions.
Set up a ghost MySQL user? (Recommended)
If you provided your root MySQL user, Ghost-CLI can create a custom MySQL user that can only access/edit your new Ghost database and nothing else.
Set up NGINX? (Recommended)
Sets NGINX up automatically enabling your site to be viewed by the outside world. Setting up NGINX manually is possible, but why would you choose a hard life?
Set up SSL? (Recommended)
If you used an https Blog URL and have already pointed your domain to the right place, Ghost-CLI can automatically set up SSL for you using Let’s Encrypt. Alternatively you do this later by running ghost setup ssl at any time.
Enter your email
systemd is the recommended process manager tool to keep Ghost running smoothly. I recommend choosing yes but it’s possible to set up your own process management.
Set up systemd? (Recommended)
Choosing yes runs Ghost, and makes your site work.
Finally, start Ghost?
Choosing Yes runs Ghost, and makes your site work.
Here is an image of how the process goes:
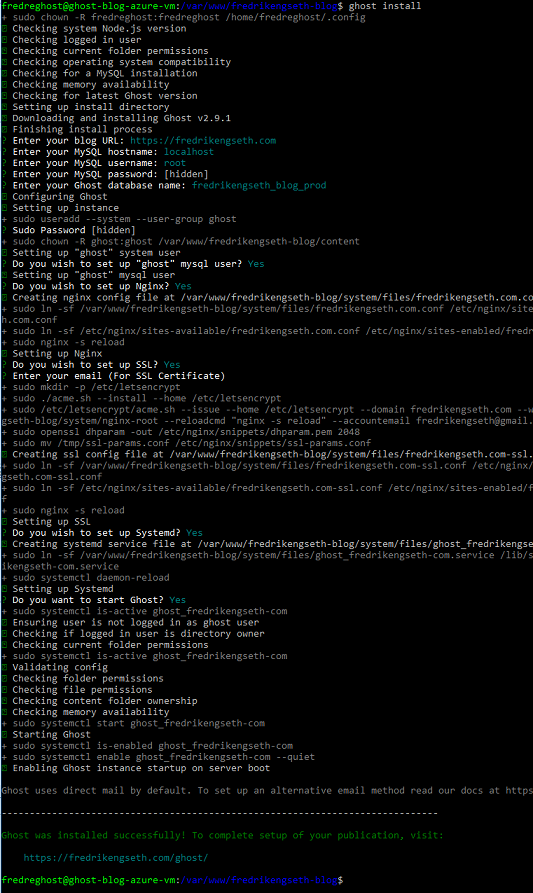
When the installation is complete and everything went smooth you can go to the website and you will see a welcome message from Ghost.
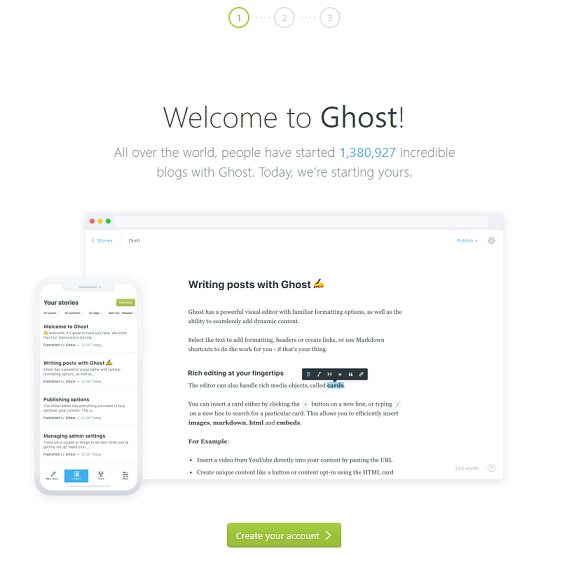
Next step is to create an account on your Ghost instance. Type in desired blog title, full name, email and Password.

Next step is to invite teammates, this can be skipped and you will access the administration panel.
When accessing your specified URL, you will see the default web site to ghost.

Cool or what?
To finish up, this was a step by step guide on how to deploy Ghost on Azure using an Ubuntu 18.04 virtual machine. Hope you enjoyed it!
Other resources I used to debug and figure out some problems regarding the VM setup and SSH configurations.
Use SSH keys with Windows for Linux VMs
For troubleshooting issues with SSH connections, check out the docs
Troubleshoot SSH connection issues to an Azure VM
You can also follow this Quickstart from Microsoft to create a Virtual machine:
Quickstart – Create a Linux VM in the Azure portal


