In this blog, we will show how to set up a free power apps development environment step by step. Power Apps is a platform that allows you to build custom business applications, and having your own environment can be extremely beneficial when it comes to testing and experimenting with your designs. Whether you are a seasoned developer or just starting out, this guide will help you set up your own Power Apps environment quickly and easily.
Prerequisites
- A work or school email address
Step 1: Go to: https://powerapps.microsoft.com/en-us/developerplan/
Step 2: Click Get started free.

Step 3: Enter your work or school email address > Click Next.

Step 4: If your work or school email address is already a Microsoft customer you can choose to sign up.

NOTE: If you’re not already a Microsoft customer you will get a message to contact your IT admin to get access like the image below. It requires an existing subscription or license to Microsoft products to sign up for the Trial environment.

To solve this you can create your own free organization sandbox by applying to the Microsoft Developer Program here, https://developer.microsoft.com/en-us/microsoft-365/dev-program. The Microsoft Developer Program gives you an instant sandbox pre-configured with sample data, including Teams Developer Portal, where you can start developing on the Microsoft 365 platform.
After signing up to the developer program you can use the work email address of your user in the sandbox tenant, and set up a free power apps development environment😉

Step 5: Clicking Sign In will prompt you to Sign In. Proceed with the steps and continue.

Step 6: After signing in you need to add your Country or Region and your Business phone number. If you want to receive information about products and services, as well as let Microsoft share information to partner you can select that.

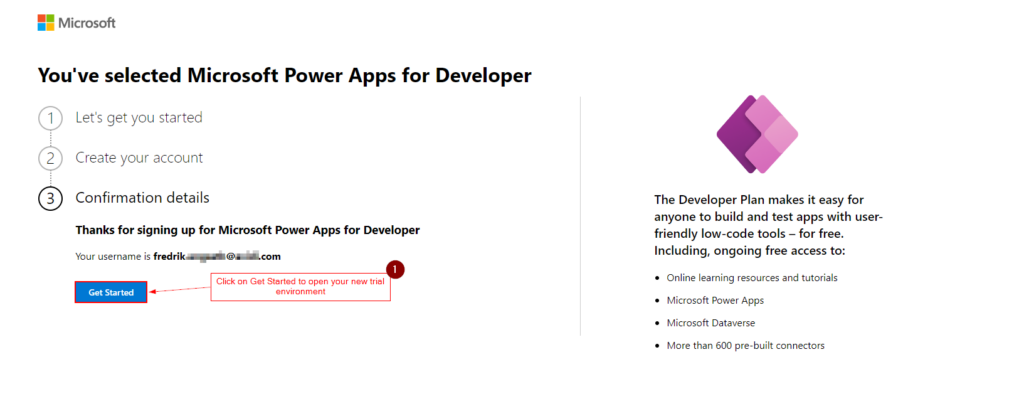
Step 7: Click Get Started to open your new trial environment.

Clicking Get Started displays an indication for a brief moment while the license configuration is getting ready.

Step 8: Before accessing the environment you need to provide some contact information before proceeding, or you can close it if you don’t want to provide the information.

Step 9: Your list of environments will show the new trial environment has been created.

Note: It takes a few minutes before the Dataverse database is created, and you will then see the new environment under Build apps with Dataverse.

Step 10: You are now ready to build apps in your new free development environment.
I hope you found it helpful!


