This post is about how to generate Dynamics 365 record URLs in Power Automate dynamically. The use case for this is often when you want to notify users of changes or reminders and you want to send a notification with a link so that they more easily can open the record. There are many different approaches on the web and this is a summary of what I’ve found.
The reason why we want to generate a record URL in Power Automate is that the Environment URL changes, and also the App Id might be different if you are moving your flow to different environments. In the image below we can see an example of what a Case record URL in Dynamics looks like. The record URL is built up with an environment URL, App Id, and a reference to the entity. To be able to send a notification to the users with the link to the record in the right environment we need to send them the correct URL based on the environment that the flow is running in. So, if we have three environments like dev, test, and production with different Environment URLs, we need to take this into consideration when creating the notification message for the user.
In this post, we look into how we can generate record URLs in Power Automate dynamically by creating a link below where the values in the image below are dynamically generated instead of “hardcoded”.

How to create the flow
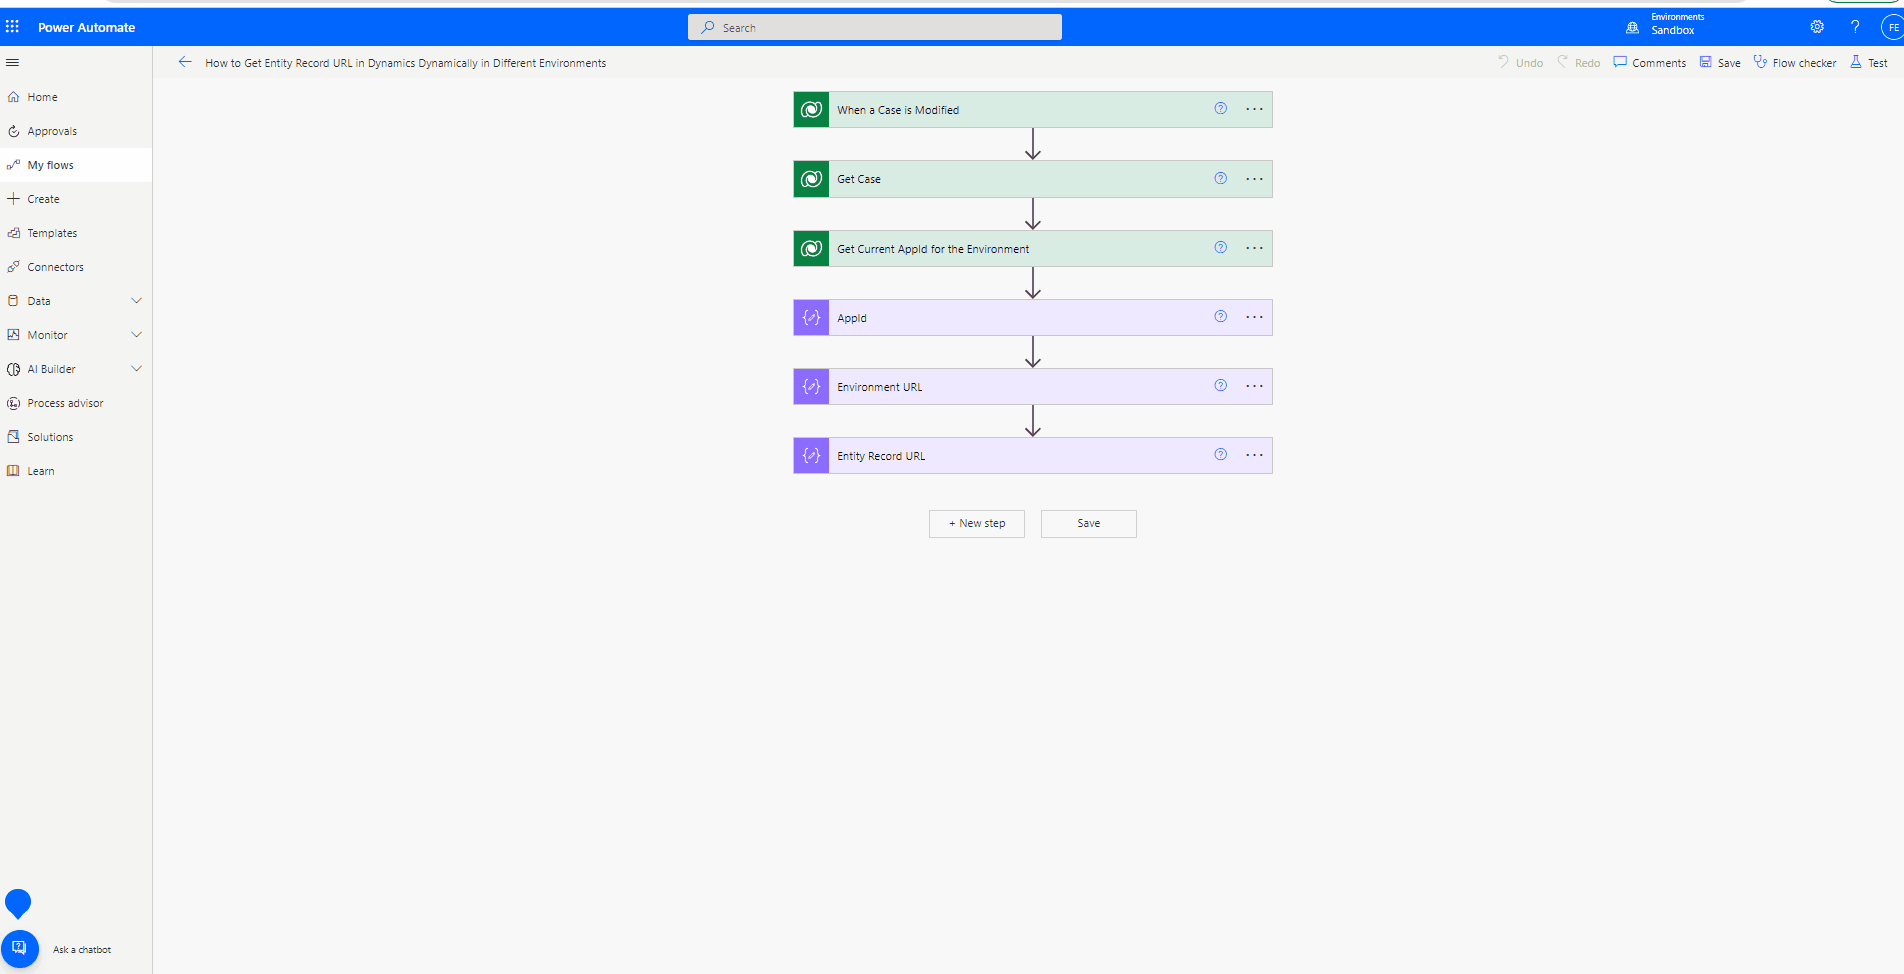
In this section, we look at how we can create a flow for generating Dynamics 365 record URLs for the Case table in Dynamics 365 CE. The example will look at each step of creating a dynamics record URL based on when a Case record is modified in Dataverse.
1. First, we create a trigger using the “When a row is added, modified, or deleted” and we change that to only trigger when an owner is modified on a Case record. In this example, the flow will only trigger when the owner of the case is changed. This is to notify the new owner about the changes.

2. Next, we need to get the Case record that was triggered to get the field that we need for retrieving the information about the environment. In the “Get Case” action we use the Case Id (incidentid) in the Row Id and select the columns we need by specifying the columns in the “Select Columns”. This step continues after the image below.
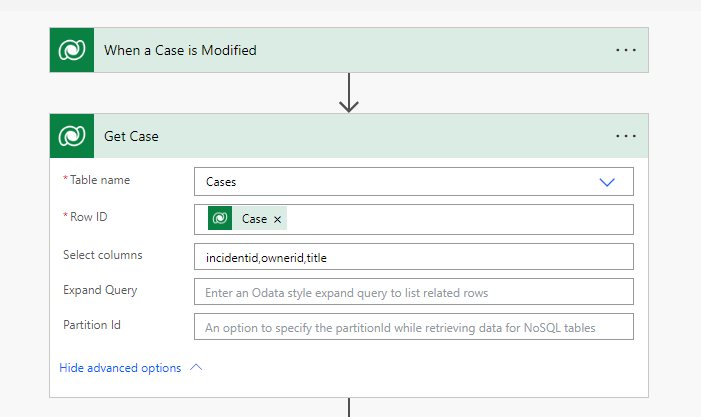
The reason we need to get the Case record after the trigger is that the trigger only outputs data about the Case and not the environment. By retrieving the same Case record afterward we get more information about the environment and the record. The field we are looking for and are going to use later in the post is the OData Id field which is highlighted in the image below.

3. The last thing we need to retrieve before we are creating the dynamic URL is the App Id. In this example, we use the Customer Service Hub app from a trial environment. We are going to retrieve this in Power Automate and for that, we need to retrieve the unique name of the App, since the App Id may be different between environments.
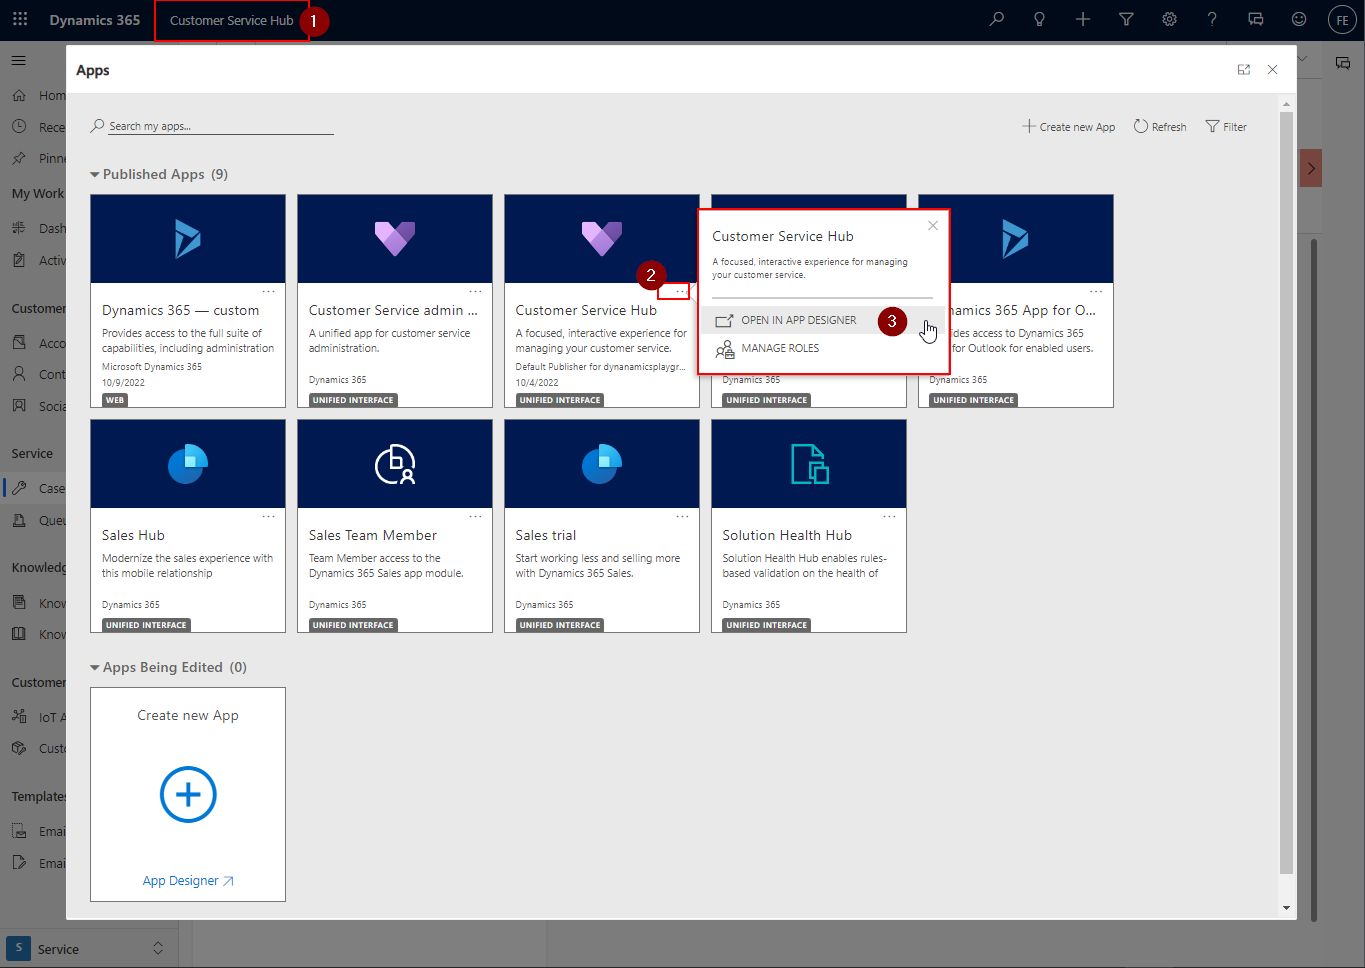
To find the unique name we can either use Javascript by opening the Case record and opening the developer console and run the snippet from the post, https://fredrikengseth.com/javascript-code-snippets-for-dynamics-365-cheat-sheet/ and retrieve the value from the console. Or, we can get it by following the steps below:
Open all Apps > Then open the Customer Service Hub app in the App Designer > Look for Advanced settings in the side menu > Copy the unique name.

4. Next up, retrieve the App Id in Power Automate. For this, we need to use the “List rows” action from the Dataverse Connector (I renamed it to “Get Current AppId for the Environment”). Here we are listing Model-driven Apps, and by filtering on the Unique name that we found in the previous step get the app we want.

Now that we have retrieved the data we need we can start to create the dynamic URL.
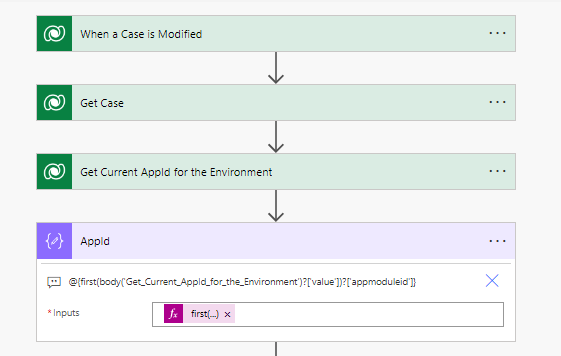
5. To get the App Id from the action “Get Current AppId for the Environment” we can create a compose that we add the following expression to:
first(body('Get_Current_AppId_for_the_Environment')?['value'])?['appmoduleid']
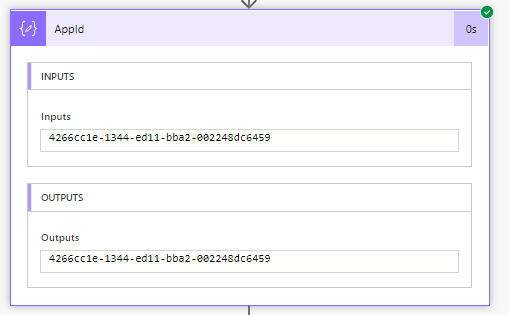
If we run the flow, the compose step will output the App Id.
6. To get the Environment URL from the OData Id field in the “Get Case” action we can create another compose and add the following expression:
uriHost(outputs('Get_Case')?['body/@odata.id'])
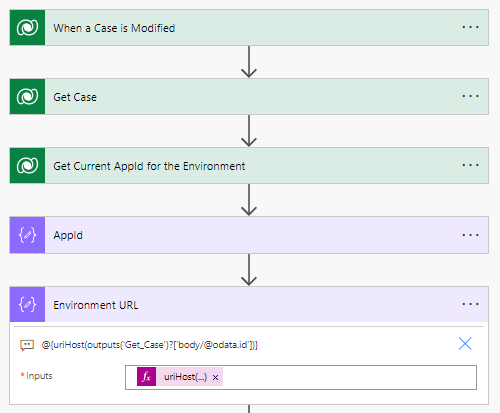
If we run the flow, the compose step will output the Environment URL

7. Now we want to stitch all things together. To test this, create another Compose action and paste the URL from the Case record URL that we looked at at the start of the post. Replace the parts with the dynamic values that we created in the previous steps. And, see below what the URL looks like in the Compose before and after.
URL before:
This is how the URL looks like in Dynamics when a specific case is open.
https://dynanamicsplayground.crm19.dynamics.com/main.aspx?appid=4266cc1e-1344-ed11-bba2-002248dc6459&pagetype=entityrecord&etn=incident&id=dfbbc145-2f3a-4183-a4b2-03e8f4b566d5
URL after:
We want to replace the Environment URL, App Id, and Case Id (incidentid) to generate Dynamic URLs when a case is updated.
https://@{outputs('Environment_URL')}/main.aspx?appid=@{outputs('AppId')}&pagetype=entityrecord&etn=incident&id=@{triggerOutputs()?['body/incidentid']}

When testing the flow it will output the same URL as if it was “Hardcoded”.

We can now use this URL in notifications, email messages, and more.
8. If you want to shorten the flow we can take the expression from the Compose steps and use them directly in the Compose step “Entity Record URL”. The other Compose steps were used to see how to retrieve each value before it was stitched together.
We can remove the Compose steps “Environment URL” and “App Id” and use the expression directly in the “Entity Record Url” as shown below:
https://@{uriHost(outputs('Get_Case')?['body/@odata.id'])}/main.aspx?appid=@{first(body('Get_Current_AppId_for_the_Environment')?['value'])?['appmoduleid']}&pagetype=entityrecord&etn=incident&id=@{triggerOutputs()?['body/incidentid']}

This will output the same result as the previous version of the flow, but now you have a shorter flow with fewer steps😉

Below is a gif of the first flow and what it looks like.
Hope you found the post useful!
For More Content See the Latest Posts
- Speeding Up Power Automate: Replacing ‘Append to Variable’ with ‘Compose’ for Efficient Workflows
 Discover how replacing ‘append to’ variables with ‘compose’ actions in Power Automate can drastically speed up your flows.
 - Why and How to Implement DevOps?
 Discover how to implement DevOps for faster software delivery, improved quality, and better team collaboration.
 - Quick Tip: Show and Hide Option Set Options in Dynamics 365 with JavaScript
 Learn to dynamically manage Option Set options visibility in Dynamics 365 forms, enhancing UI and user experience in just a quick read.
 - Understanding Dynamics 365 Customer Service Components: Key Features and Benefits
 Learn the concepts of Dynamics 365 Customer Service: Boost satisfaction with case management, knowledge bases, and multi-channel support.